手動で構築
コンテナの起動
Ubuntuのコンテナ内で、手動でApache環境を構築する。
まずUbuntuのコンテナを起動する。その際、ホスト側のポート8080とコンテナ側のポート80をバインドしておく。
|
1 2 3 4 5 6 7 8 9 10 |
>docker images REPOSITORY TAG IMAGE ID CREATED SIZE ubuntu latest e4c58958181a 5 weeks ago 77.8MB >docker run -itd --name ubuntu -p 8080:80 ubuntu eb8507829f87e2917c43abc8ed22158bfae753f1f3977760fca1cf06cc0eaa62 >docker ps -a CONTAINER ID IMAGE COMMAND CREATED STATUS PORTS NAMES eb8507829f87 ubuntu "/bin/bash" 5 seconds ago Up 3 seconds 0.0.0.0:8080->80/tcp ubuntu |
UbuntuのBash環境に入る。まだ/varディレクトリー下にwwwディレクトリーはない。
|
1 2 3 4 |
>docker exec -it ubuntu /bin/bash root@eb8507829f87:/# ls /var backups cache lib local lock log mail opt run spool tmp root@eb8507829f87:/# |
インストール
まずapt update。
|
1 2 3 4 5 6 7 8 9 10 |
root@eb8507829f87:/# apt update Get:1 http://archive.ubuntu.com/ubuntu jammy InRelease [270 kB] Get:2 http://security.ubuntu.com/ubuntu jammy-security InRelease [110 kB] Get:3 http://security.ubuntu.com/ubuntu jammy-security/universe amd64 Packages [1009 kB] ・・・・・ Reading package lists... Done Building dependency tree... Done Reading state information... Done 9 packages can be upgraded. Run 'apt list --upgradable' to see them. root@eb8507829f87:/# |
systemctlをインストール。
|
1 2 3 4 5 6 7 8 9 10 |
root@eb8507829f87:/# apt install -y systemctl Reading package lists... Done Building dependency tree... Done Reading state information... Done ・・・・・ running python rtupdate hooks for python3.10... running python post-rtupdate hooks for python3.10... Setting up systemctl (1.4.4181-1.1) ... Processing triggers for libc-bin (2.35-0ubuntu3.4) ... root@eb8507829f87:/# |
次にapache2をインストール。
|
1 2 3 4 5 6 7 8 9 10 11 12 |
root@eb8507829f87:/# apt install -y apache2 Reading package lists... Done Building dependency tree... Done Reading state information... Done ・・・・・ Processing triggers for libc-bin (2.35-0ubuntu3.4) ... Processing triggers for ca-certificates (20230311ubuntu0.22.04.1) ... Updating certificates in /etc/ssl/certs... 0 added, 0 removed; done. Running hooks in /etc/ca-certificates/update.d... done. root@eb8507829f87:/# |
/var/wwwディレクトリーが作成され、その下のhtmlディレクトリー内にindex.htmlが作られている。
|
1 2 3 4 5 6 7 8 9 10 11 12 13 14 15 16 |
root@eb8507829f87:/# ls /var/www/html index.html root@eb8507829f87:/# cat /var/www/html/index.html <!DOCTYPE html PUBLIC "-//W3C//DTD XHTML 1.0 Transitional//EN" "http://www.w3.org/TR/xhtml1/DTD/xhtml1-transitional.dtd"> <html xmlns="http://www.w3.org/1999/xhtml"> <!-- Modified from the Debian original for Ubuntu Last updated: 2022-03-22 See: https://launchpad.net/bugs/1966004 --> <head> ・・・・・ <div class="validator"> </div> </body> </html> |
Apche2起動
systemctlでApache2の稼働状況を確認し、起動させる。
|
1 2 3 4 5 6 7 8 9 |
root@eb8507829f87:/# systemctl status apache2 apache2.service - The Apache HTTP Server Loaded: loaded (/usr/lib/systemd/system/apache2.service, disabled) Active: inactive (dead) root@eb8507829f87:/# systemctl start apache2 root@eb8507829f87:/# systemctl status apache2 apache2.service - The Apache HTTP Server Loaded: loaded (/usr/lib/systemd/system/apache2.service, disabled) Active: active (running) |
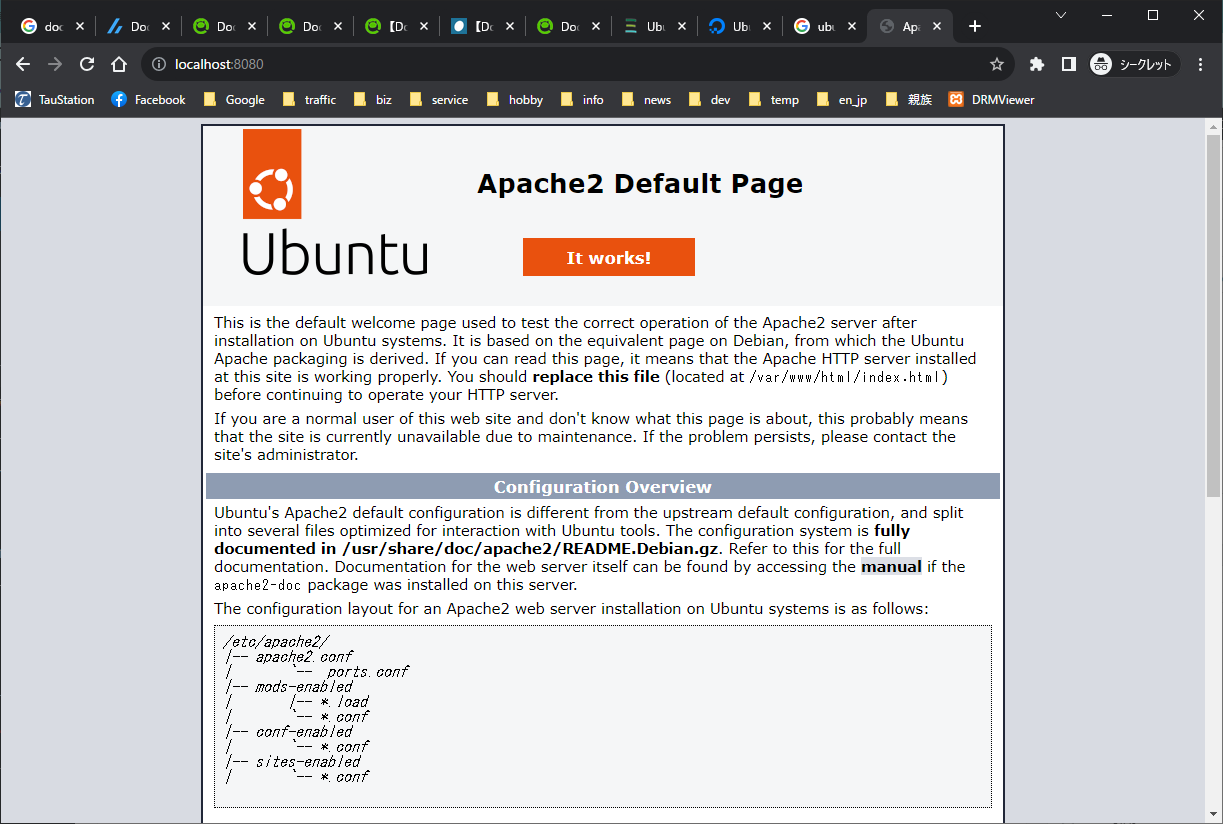
ここでブラウザーからlocalhost:8080にアクセスすると、Apache2のデフォルトページが表示される。

Dockerfileでイメージ生成
Dockerfileに記述した内容で、指定した構成のイメージを作成することができる。ここではUbuntuのイメージをベースに、Apache2をインストールして実行させるイメージを作成する。
まず、Dockerfileを以下の内容で作成する。
- FROMでベースとなる既存のイメージを指定
- RUNで実行開始後にaptをupdateし、systemctlとapache2をインストール
- CMDでsystemctlを実行させ、apache2を起動する
- ホストとコンテナのポートのバインディングは、コンテナ起動時に指定する
|
1 2 3 4 5 6 7 8 |
FROM ubuntu:latest RUN \ apt update && \ apt install -y systemctl && \ apt install -y apache2 CMD ["systemctl", "start", "apache2"] |
Dockerfileがあるディレクトリーでbuildを実行。
docker build [Dockerfileの場所] -t [コンテナ名]
Dockerfileと同じディレクトリーでこれを実行しているので、Dockerfileの場所は'./'。何度か同じ操作を繰り返しているのでキャッシュが使われていてメッセージはシンプル。
|
1 2 3 4 5 6 7 8 9 10 11 12 13 14 15 16 |
>docker build ./ -t ubuntu-apache [+] Building 1.2s (6/6) FINISHED docker:default => [internal] load build definition from Dockerfile 0.8s => => transferring dockerfile: 187B 0.1s => [internal] load .dockerignore 0.4s => => transferring context: 2B 0.0s => [internal] load metadata for docker.io/library/ubuntu:latest 0.0s => [1/2] FROM docker.io/library/ubuntu:latest 0.0s => CACHED [2/2] RUN apt update && apt install -y systemctl && apt install -y apache2 0.0s => exporting to image 0.0s => => exporting layers 0.0s => => writing image sha256:becd48c3de484b5bf8aa7c433ca4725627d2471f8eb551fb8733bef02a4e650a 0.0s => => naming to docker.io/library/ubuntu-apache 0.0s What's Next? View summary of image vulnerabilities and recommendations → docker scout quickview |
作成されたイメージを確認。
|
1 2 3 4 |
>docker images REPOSITORY TAG IMAGE ID CREATED SIZE ubuntu-apache latest becd48c3de48 13 hours ago 259MB ubuntu latest e4c58958181a 5 weeks ago 77.8MB |
コンテナ名、ポート番号のバインディングなどを指定してrunを実行。
|
1 2 3 4 5 6 |
>docker run -itd --name ubuntu-apache -p 8080:80 ubuntu-apache f1c26225c3a0d4292c62815c852bd3df7f512d108771c8b3b5ca1c833ee48aed C:\dev\docker\ubuntu>docker ps -a CONTAINER ID IMAGE COMMAND CREATED STATUS PORTS NAMES f1c26225c3a0 ubuntu-apache "systemctl start apa…" 7 seconds ago Up 4 seconds 0.0.0.0:8080->80/tcp ubuntu-apache |
この状態でブラウザーからlocalhost:8080にアクセスすると、Apache2のデフォルトページが表示される。
Docker Composeで起動
コンテナを起動するのに、毎回コマンドラインでコンテナ名を指定したりポートをバインドするのではなく、Docker Composeを使って事前に定めておく。
本来Composeは複数のコンテナを連携させるのに使われるが、単一のコンテナの起動設定にも使える。
まずDockerfileと同じ場所に以下の内容でdocker-compose.ymlファイルを作成する。
|
1 2 3 4 5 6 7 8 9 10 11 12 13 14 |
services: web: # イメージ指定 image: ubuntu-apache # コンテナ名指定 container_name: ubuntu-apache # ボリュームのバインド volumes: - type: bind source: ./share target: /var/www/html # ポートのバインド ports: - 8080:80 |
そしてdocker-composeを実行。その際、デーモンで実行させるため-dオプションをつける。
|
1 2 3 |
>docker compose up -d [+] Running 1/1 ✔ Container ubuntu-apache Started |
この状態でバインドされたホスト側のディレクトリーにindex.htmlを作ったり変更すると、localhost:8080にアクセスしてその内容が確認できる。
1件のコメント